

Since buying my house in 2015 I have always used plastic fold up tables as my work benches and well, you know how that goes. Super difficult to clamp stuff to and really flimsy, even though I set my Subaru engine on one.
Today I finally decided to build a proper workbench and had my buddy Art help me out. This was my first time really building anything so it was kind of cool to see it come together. I only used a harbor freight miter saw, drill, tape measure and screws. Super simple build. As for planning I sketched a little blueprint, then went to Home Depot to buy the material.
Day 1
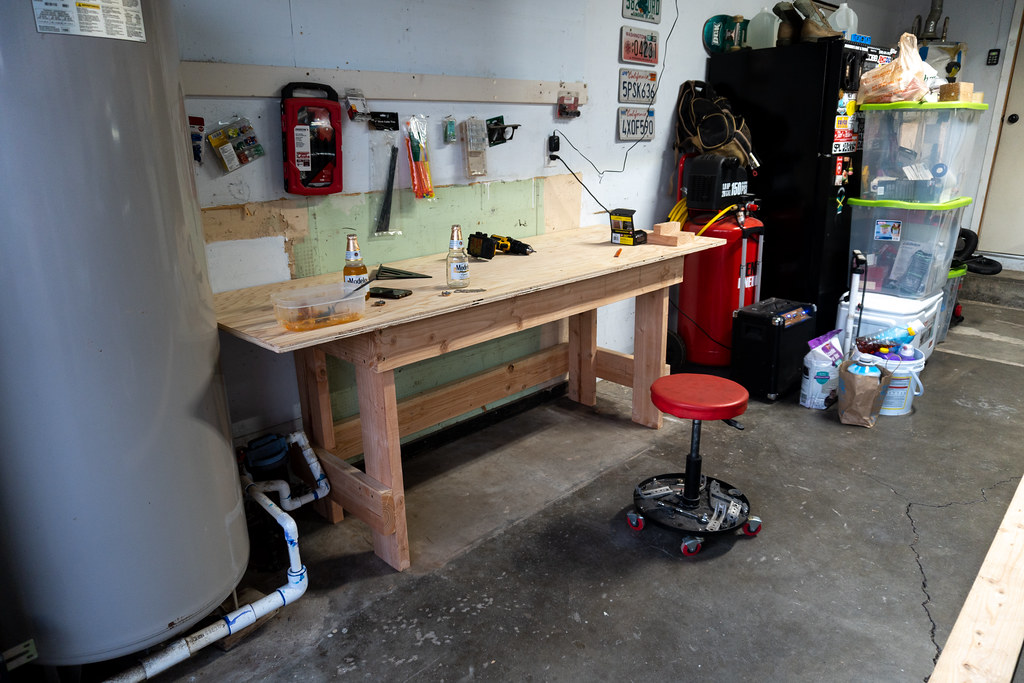
Here’s a before shot including the 2x6s that I picked up, I bought 5 but only needed 4 and one 4×8 sheet of 3/4″ plywood that was later cut to 27″Dx80″L.
Featuring Modelos to keep us nice and cool.

Here is Art cutting the 4 corner legs, that were cut to 32″.

Using my cheap little miter saw that I got from Harbor Freight a few years ago, it’s not too bad.

Once the legs were cut, we figured out how wide to make the table top support that way I can have some hang over where the house water filter is.

No Modelos were harmed in the making of this workbench.

It really didn’t take long, but the workbench looks really nice and is super sturdy. I ordered some castor wheels that pivot down/up for ease of moving the workbench around. Eventually I will repaint the walls, put up new cabinets and storage shelves.
Even though the cuts were not %1000 perfect all the way around, we still took our time and tried our best to make everything nice and even. Which ended up leaving the workbench level after finishing it up.


It was a fun and cheap first wood working project and I really have to make some more things for storage organization around the house. So it was nice to get some practice with this workbench.
Day 2…
I didn’t really plan on painting the bench but the raw wood just sticks out too much for my personal taste. I like greyscale colors for decor so I chose grey and white. I might hate myself later on for doing a white top but I have plenty of paint to refinish monthly or whatever. When I make storage racks I’ll use the same color scheme.
Plastic drop spread out since I knew it was going to get messy.

The paint that I picked up from Home Depot, my second home.

Applying the primer sucked cause I had to do a few coats and getting underneath the bench was difficult, I believe it paid off but man I wish I brought out my HVLP spray gun out for this. It was also so white that I was being blinded by the suns reflection.

Color scheme coming together with grey framing and white top

There was a small piece of drop from when I got the plywood cut at Home Depot and it stuck out to me as the perfect size for a light duty flip up extension. It for sure cannot hold much weight but it’s still nice to have the extra desk space when needed.


Since I drink beer sometimes while working on projects in the garage, this bottle opener just had to be added.

Kind of weird but Home Depot and Lowe’s didn’t have any bench vises in stock so I ordered one on amazon.
Day 3
Today the castor wheels and vise came in.

These wheels pivot down when needed and back up when not in use, pretty handy in moving the bench so I don’t have to drop it around.


Moving the workbench is so much easier with the wheels. Later that day the vise came in.

The bench is setup now ready for use but my mind cannot handle the cluttered appearance which stems from the mismatched painted walls and disgustingly stained floors. But I am happy for now.


Leave a comment